If you’ve stumbled across this blog, you’re probably in a bit of a conundrum. Someone on Amazon is using your images without your consent. Don’t panic just yet, as we’re here to help. In this blog, we’ll provide you with a step-by-step guide to reporting those images and hopefully getting them taken down. I know you’re already pretty frustrated and worried, so I will provide as little fluff as possible throughout the blog. I’ve personally been in this situation myself so I know this process can work.
Read More:- AMZ One Step Vs Jungle Market – The Best Marketplace for Amazon Sellers
Now let’s get into it.
How to Find Your Images That Are Being Stolen:

You may not even know that your images are being used on Amazon without your consent in the first place. This blog will show you how to check, and if your images are being used, we’ll show you how to get them taken down.
Hop On the Amazon Buyer App:
You probably already have the app downloaded, but if you don’t, download the app on your iPhone or Android now. You’re going to want to press the camera icon on the top right of the screen.
Read More:- 3D Rendering vs Product Photography & Which One Is A Better Option For Amazon Sellers?
Analyze the Picture:
Next, make sure the product in question is in clear view of your camera. By pressing the middle circle button, it will begin to analyze the image. (For this example, we will be using Crayola but in no way are we inferring that they or their distributers have stolen any images.)

We do this because Amazon will then scour their database and let you know where the image appears on their website. The search results tab will then appear, and you can see where this image is on the site.
Read More:- Amazon Product Photography Tips To Adopt In 2022
Finding the Company’s Name:
You will then be able to go to any listing with the image and find their company name under the Buy Now Button. The company name should appear after the Ships from (whatever location) and sold by (the company name).

Once you have the company’s name, go to your desktop and type it into the search bar.
Click on their first listing. By the add to cart area you should see it say ships from and sold by (company name). Click on that.
Finding The Storefront:
The next page will be the review page where you can find the button to their storefront in the top left corner.

Now you will see all of the items they have in their storefront. Then go back to the search bar and search for a word that is relevant to your product.
Note* You should now see the company’s name next to the search bar as shown here.

If they have categories on the left, choose a category that your product’s image might be used in.
Read More:- EDMONTON AMAZON SELLER & CONFERENCE
Being Organized Part 1
You are going to have to prepare yourself to be super organized here. Hover over the title and right-click “Open in new tab” (I am on Mac, but it should be the same idea on PC). Do this for each one of your suspected stolen image listings so that you have every tab open and ready to go when it comes time to do the report.
Bookmark each tab so that you can go back and make sure that the listing has been taken down after your report. This can also help to ensure that you don’t submit the same URL twice. An alternate way of doing this may be to copy every URL into a word doc and keep track of them that way. Whatever you prefer.
Copyright Infringement Page:
Next, you are going to go to the copyright infringement page on Amazon. You DO NOT have to be an authorized seller on Amazon to submit a claim.
Go ahead and click the word form that is highlighted blue.
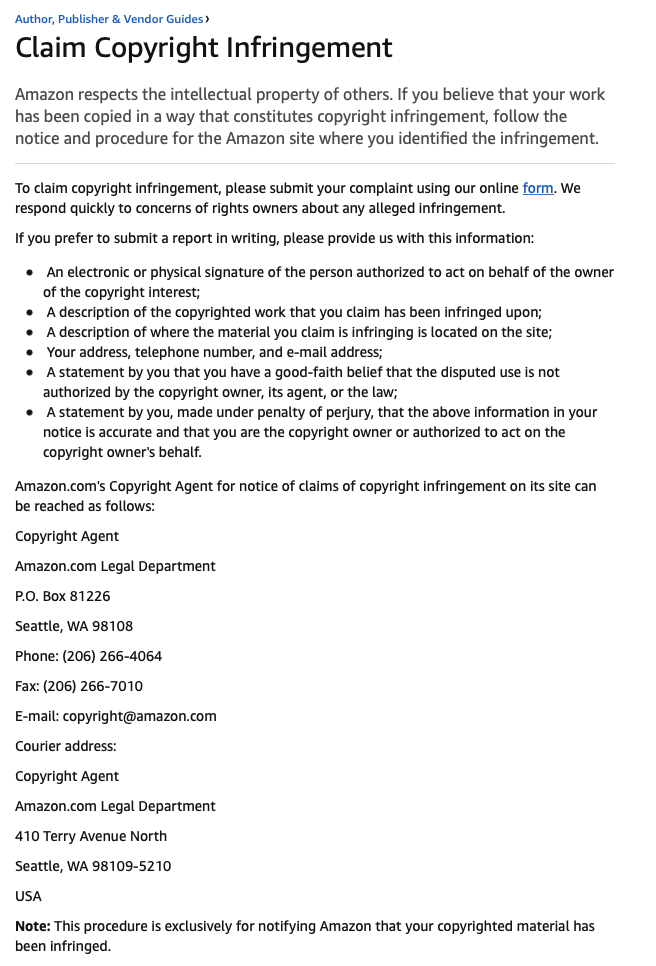
You will now be taken to the form.
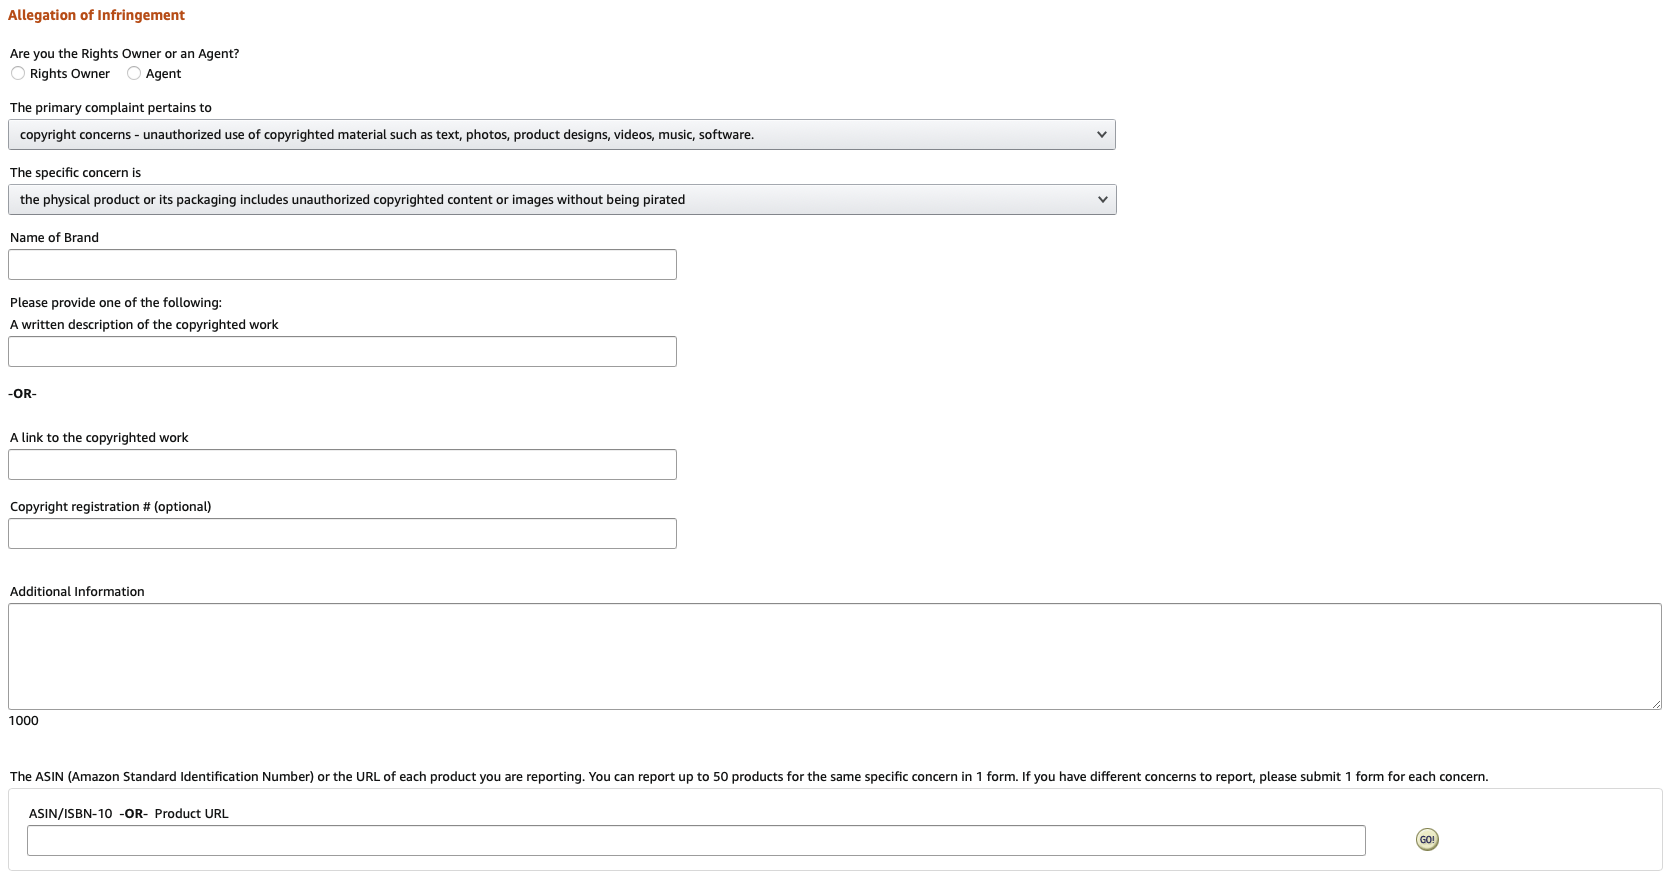
Read More:- 10 Tips on How to Sell Branded Products on Amazon
State The Facts:
Here is where you’re making your case to Amazon. I know you may be flustered and angry when writing this, but it is best to stay calm.
Layout the facts and keep it simple.
You can use something to the effect of “This store is using my images without my authorization, and I want them removed.” You can obviously go into more detail but be concise.
Being Organized Part 2:
Remember when I talked about being organized earlier? Well, this is where the organization of those tabs you saved comes into play.
You’re going to want to take the URLs that you have bookmarked and put them in the URL spot.
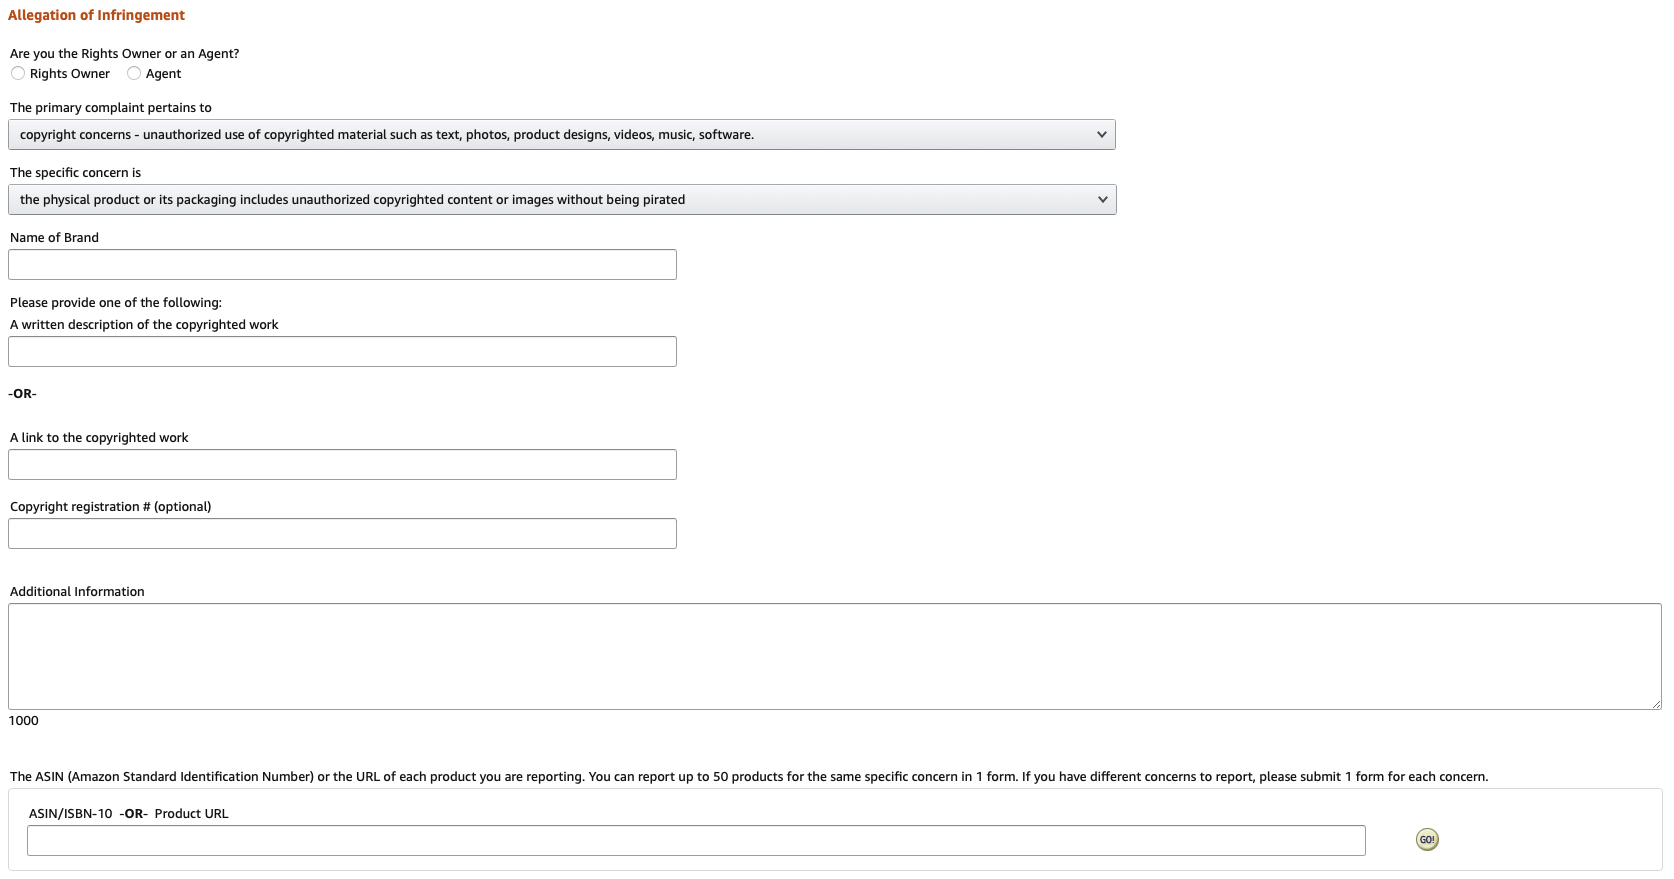
Under Scope on the right select Specific Images.

The images will then pop up below with a square beside them. Check off every square where you see a copyrighted image.
Repeat This Process for Up to 50 Listings:
This part can be tedious, but unfortunately, it is necessary so that these stores don’t profit off of your work.
Note* If multiple companies are using your images, you will have to file a claim for each seller.
Final Steps:
Fill out your contact information. Send the filled-out form and then wait.
Amazon will get back to you within a couple of days. Be aware, Amazon does not always side with you and may state that there isn’t enough evidence or give some other reason as to why your claim is not successful.
This can be extremely frustrating but don’t give up hope just yet. Amazon will always review a report again and it can work; just keep trying.
Read More:- 10 Reasons Why Your Amazon Seller Account is Suspended!
In Conclusion:
Image theft constantly happens across the platform, so it is a good idea to systematically scan your image to ensure no other sellers have stolen your image since you last checked. This blog will always be here so that you can reference it when going through the copyright claim process (although we hope that you won’t have to go through all of this trouble again).
I hope this has helped. Be sure to subscribe to our email list and check out our socials so that you stay on top of our tips for Amazon sellers.
(Once again, these images were provided for educational purposes only. Crayola and their distributors have not stolen any images.)

Hi there! I’m the content marketing and branding specialist for AMZ One Step. I work hard to create engaging and informative content that helps our readers learn more about Amazon selling and how to make the most of their businesses. I love spending time with my family and exploring literary works when I’m not writing or working on projects.
